
Google Analytics is a very powerful tool for measuring the Website statistics.
Why Google Analytics is important for Websites
If you are a Website owner, you may want to know that how many people visit your Website every day. Among the total visitors of your Website, you may want to have statistics of visitors from different channels, like from Organic Traffic (including Google, Bing, etc.), Direct Traffic, Referral Traffic or from Social Media Traffic.
How to Set Up Google Analytics: A Step-by-Step Guide
Google Analytics is a very useful tool for measuring all the statistics of your Website traffic. Now if you have a Website and you don’t have any Google Analytics account, don’t worry, we are going to explain you how to setup your Google Analytics account.
Step 1
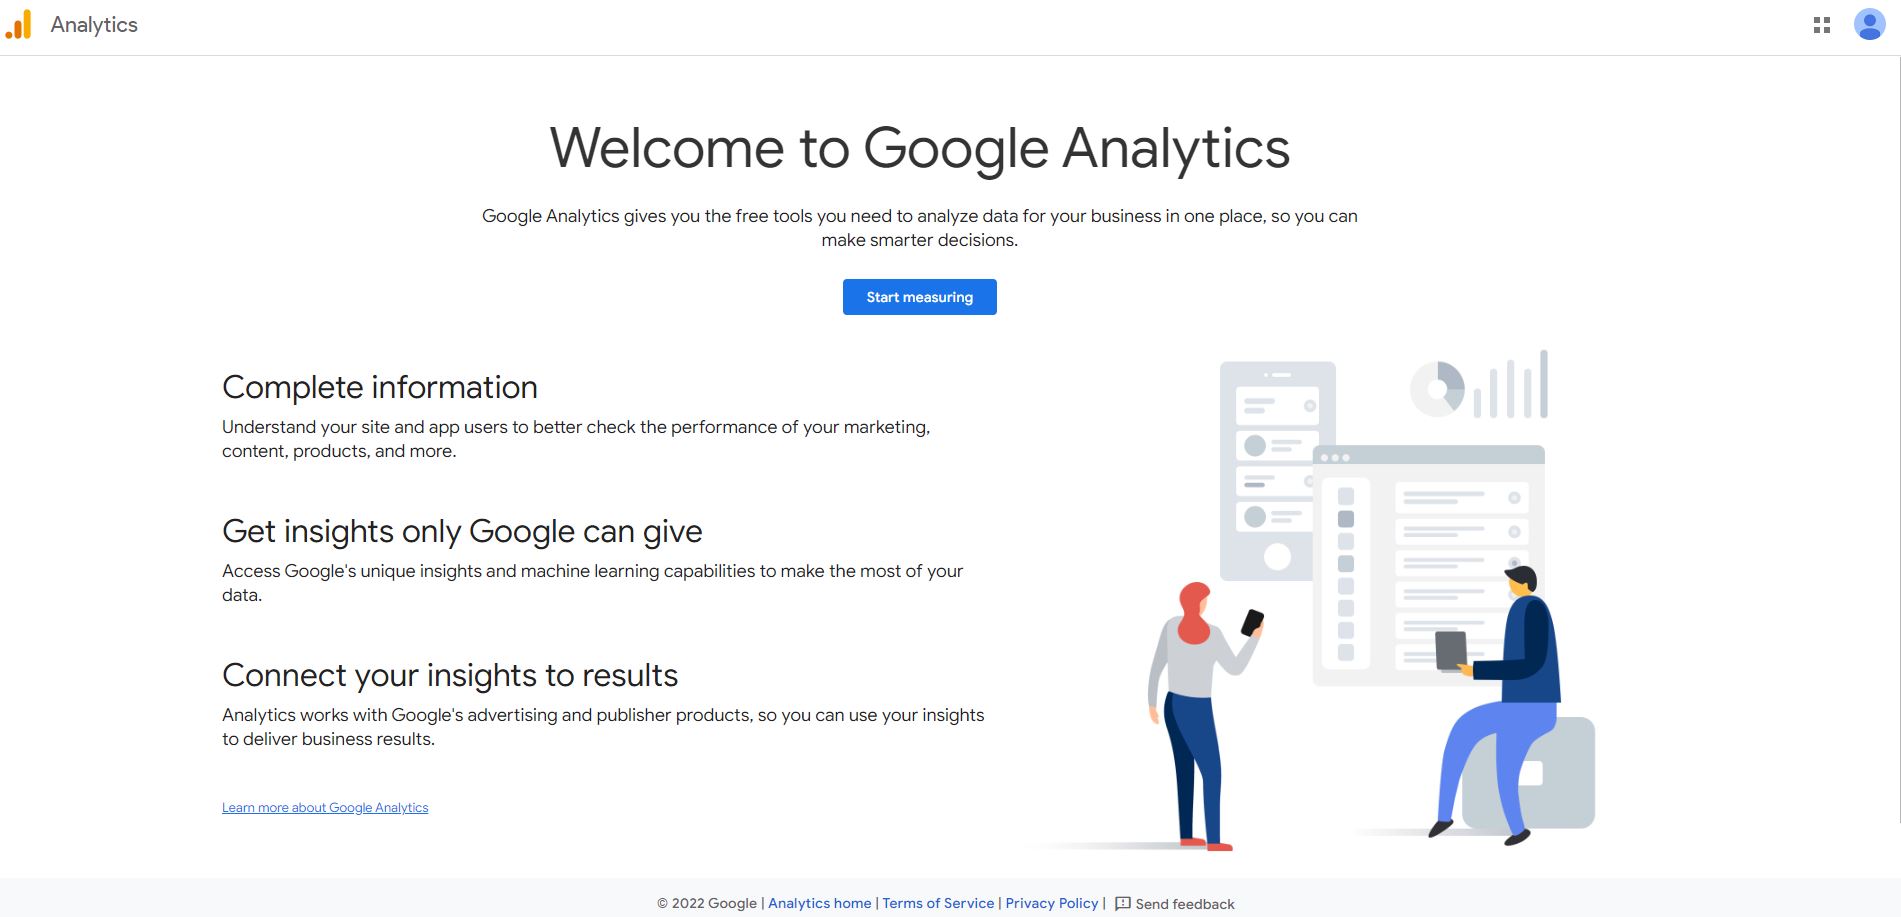
First of all, login to your Gmail account for which you want to open Google Analytics account. After login a welcome screen from Google Analytics would flash on your device screen, as shown in the picture above. Now click on the blue button of ‘Start Measuring’ in the screen. After click, another screen appears for account setup. Here your work starts.
Step 2
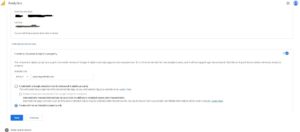
In the Account details section of this screen, you would have to put your Account Name. Suppose your Website is something about the Pet’s Welfare, then you can simply put the name ‘Pet’s Welfare’ in the Account name section of the screen.
The lower section of this screen represent Account Data Sharing Settings which actually provides control upon how you share your Analytics account data with other Google products and services. So check all the four boxes of the screen and click on the ‘Next’ button which is on the left lower corner of screen, as shown in the figure below.

Step 3
Now you would have to setup your property for which you are going to create a Google Analytics account. In the next screen, put a Property Name which may be related with your account name.
So you can put here ‘Pet’s Welfare Activity’ as a Property Name in the given box of the screen. After finishing this work, you may change the Reporting time zone, which is just below the Property Name box of the screen.
Change your Reporting time zone according to geo location. By default, it is set on United States of America. So if you are operating from United States of America, then nothing to do here but if you are living in another country, you should change your time zone according to your country.
After this, you can change the currency format according to your country or location.
Step 4
Then you will have to click on the link of ‘Show Advanced Options’ which is on the left lower corner of the screen.
This link would provide you the option of creating a Universal Google Analytics property, for your account. For creating a Universal Analytics property, you will have to drag an uncheck button on the right corner of the screen, as shown in the picture below.
Now when you open the option of creating Universal Analytics property, you would have to put your Website URL (without https://) in the given box.
If you put here your Website URL with https:// then an error message of ‘Valid website URL is required’ appears on the screen, so put your URL without https://.
After placing your Website URL, you would have to check second option of ‘Create a Universal Analytics property only’ the Universal Property, as shown in the picture above.
Step 5
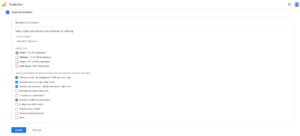
Then click the Next button on left lower side of the screen. The new screen will ask some business information from you. Select your Industry Category according to your business.
For example, if your website is all about Pet’s Welfare then select your Industry Category as Pets and Animals from the menu.
You can choose your business size according to number of employees, working in your organization and after that select the services, you expect from the Google Analytics according to your intention.
Once all these have been done, click the button ‘Create’ on the left lower side of the screen, as shown in the figure below.
Step 6
After click on ‘Create’ button, a new popup window will be open, in which you will have to check a box. Then check the box of ‘I also accept the Data Processing Terms as required by GDPR’ and click the button ‘I Accept’.
After clicking ‘I Accept’, a new popup window will be open for email communications. Check all the boxes and click on ‘Save’ button.
Step 7
Now you have your Google Analytics Tracking ID and Tracking Code on the screen. Click in the box, which contains your analytics code. Select and copy the Complete Analytics Code.
Now if your website is on WordPress then open the admin panel. Go to Appearance and then Theme File Editor.
Before this, we would advise you to take full backup of your website and do all the things very carefully, because any negligence would damage your website.
Now open Header.php from the right side of the Theme File Editor. In the box of Header.php, search the code section of head and then paste the google analytics code on the lower side of the head code section.
Streaming the data from website may take some time
Once you paste analytics code on the header of your website, your Google Analytics account would start receiving data stream from your website in the form of visitor information. However, it may take some minutes to hours to response but after 24 hours it would start giving all the data about the visitors, coming on your website.
Stay updated with Google Analytics
Sometimes your website traffic may decrease drastically. This may be due to change in Google’s Algorithm, roll out recently or it may be a big change in your website design and content, or may be something else.
Google Analytics would always be helpful for analyzing your website in every aspect. So for a Website owner Google Analytics is the best tool for measuring the Website statistics.